

I’ve been playing The Mason’s Apron with the band and in sessions for years. It’s a well-known Irish reel that you’ll hear in sessions around the world, and it’s well worth learning.
When a tune comes round again, you can give it a different feel without changing every chord. A lighter strum, a bass note or a move into the middle strings can be enough. In this lesson, I work through those choices with Shane Hayes on button accordion.
Have a listen to the opening performance first. Follow Shane’s melody and notice where the guitar changes its weight and register. Then take the rhythms and chord shapes below one at a time.
Choose a timestamp below to load that section here. If it does not start, press Play. Watch the lesson on YouTube (new tab).
Before you start: tuning, capo and chord names
Tune to DADGAD, low to high, then put your capo on the fifth fret. We are playing in sounding G. If this tuning is new to you, start with my DADGAD chord guide for the tuning and first shapes, then come back here.
At 3:55, I explain the setup. D, G, A and Em are shape names relative to the capo; their roots sound G, C, D and A. Open strings add colour, which is why some diagrams use names such as G2 and Em11.
Read fret positions relative to the capo. Numbers inside the dots indicate fingers, not frets; a side label such as 5fr locates the displayed fret range. O means an open string and X means leave that string out. Some original charts suggest different fingers from the video. Follow the demonstrated movement when choosing your fingering.
Build up three reel rhythms
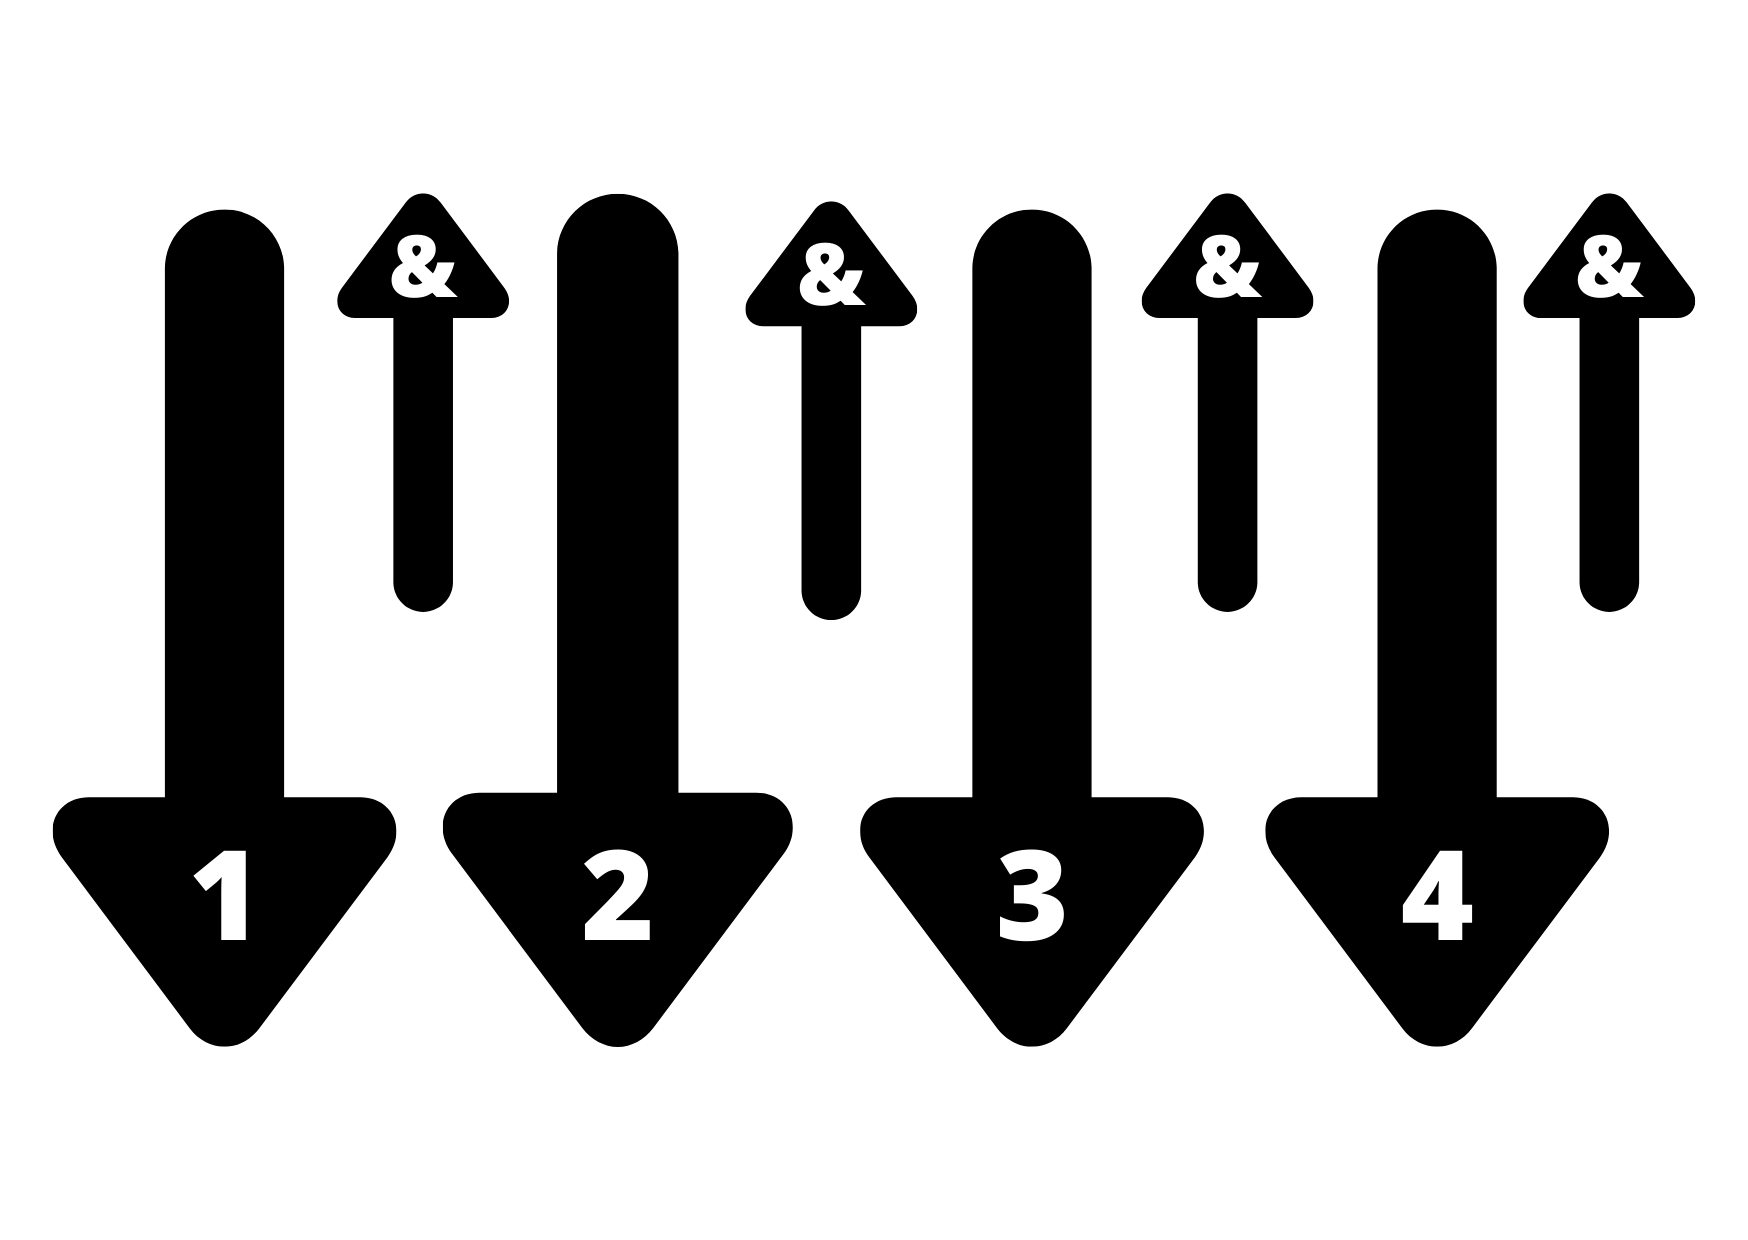
1. Start with the straight down-up strum
At 1:54, count 1 & 2 & 3 & 4 &, alternating down and up. Keep the movement even before bringing it up to the recording’s speed. Hold one comfortable shape while you find the pulse.
2. Separate bass and treble
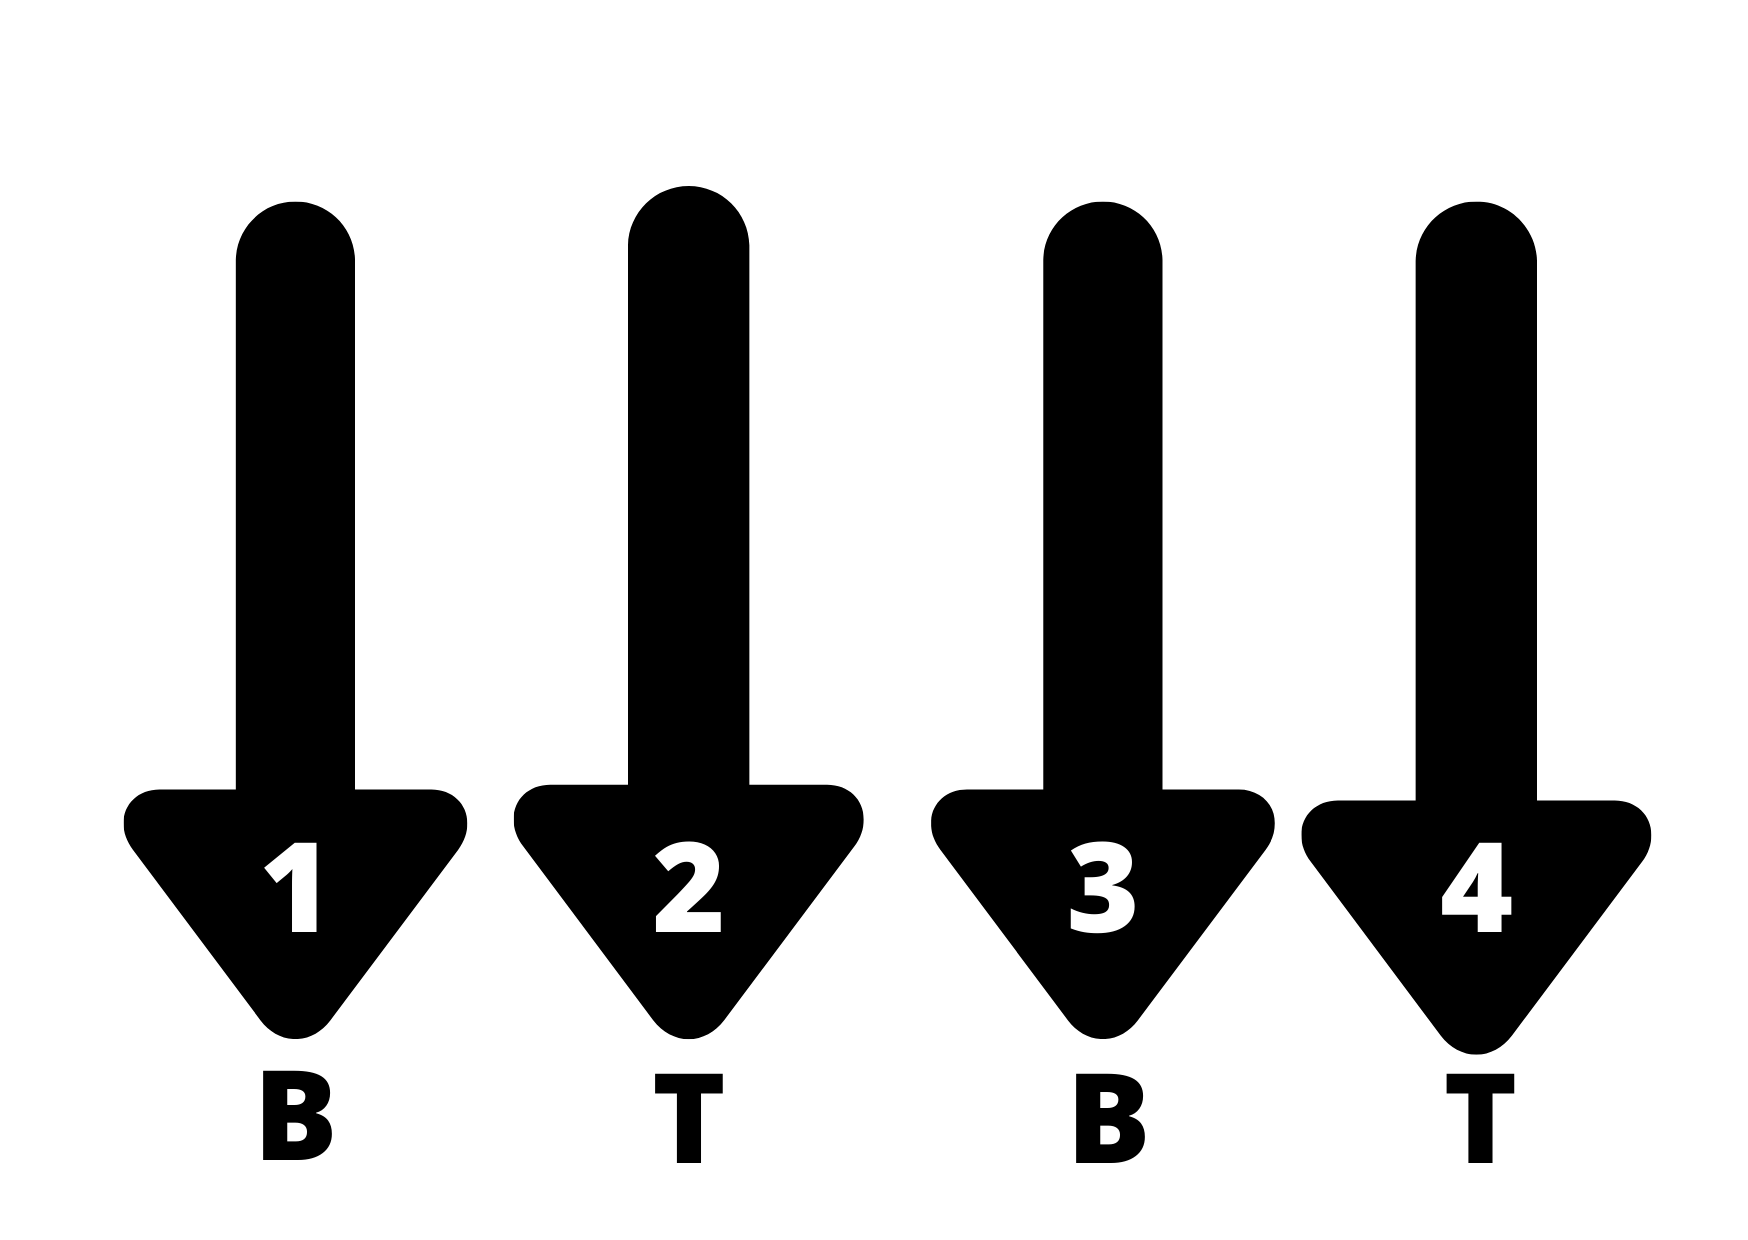
The bass–treble pattern at 2:09 uses bass on beats 1 and 3, treble on 2 and 4. Give the bass note its own place in the bar. Practise aiming for the low D string, then the A string, without catching neighbouring strings accidentally. That precision matters when you add bass movement.
3. Add the drag-chuck-boom-chuck
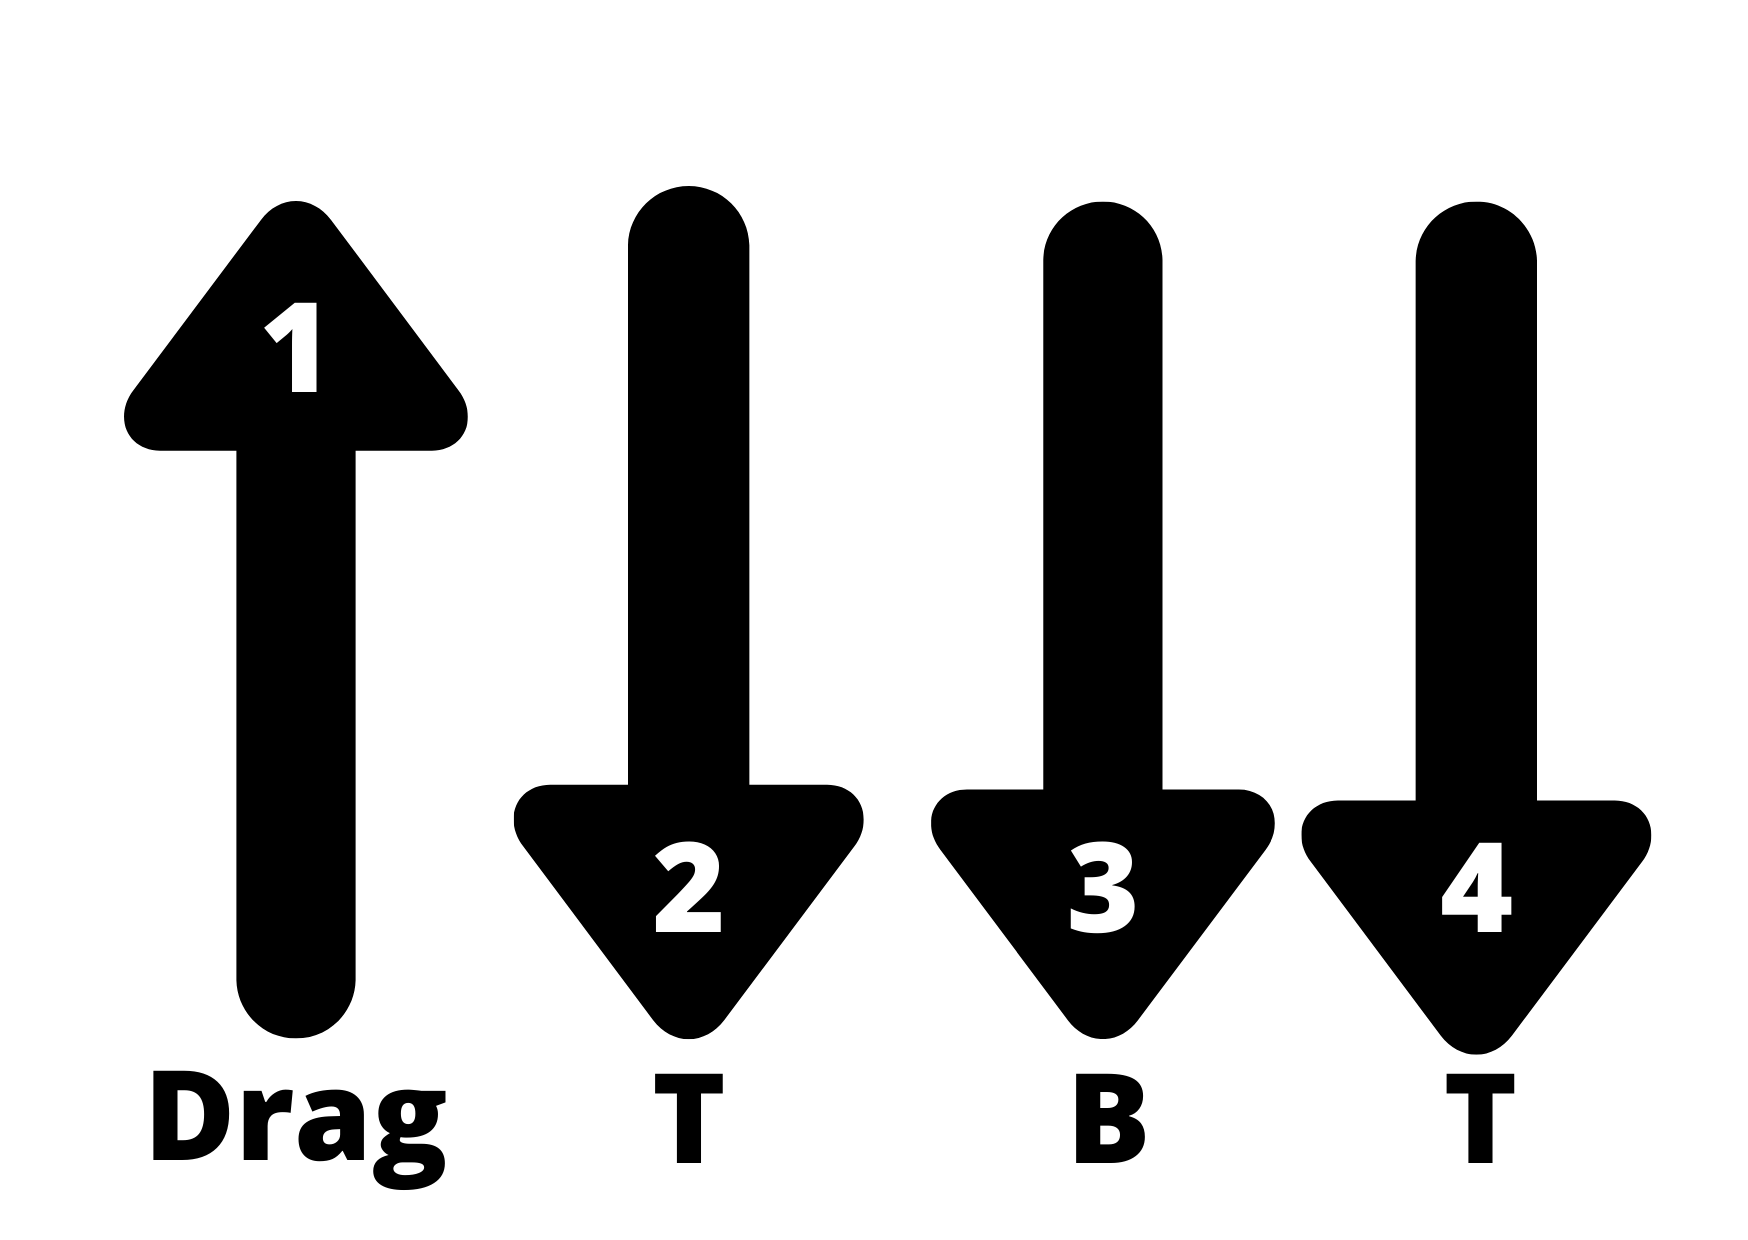
At 2:57, the upward drag lands on beat 1, followed by treble, bass and treble. Listen to how the drag leads into the rest of the pattern. Copy the feel slowly, then move between all three rhythms without letting the pulse slip.
Follow the tune with low and inside chord shapes
The D shape and inside G and A
At 3:42, I introduce the framework. Start with D, then watch the move into the inside G and A at 4:15. These bring the accompaniment into the middle and higher strings. From 4:22, pay attention to the narrower strum rather than sweeping across all six strings.



Bring the movement into the lower strings
From 4:48, I move through D/F#, low G and low A. Listen to the extra weight from the bass. You can stay with a steadier backing while learning the tune, then use these register changes when the melody becomes familiar.



The Em voicing at 5:18 gives another option within the framework. Keep listening to the melody so that a new bass note has somewhere to go.

Add movement one idea at a time
Use bass notes to lead into the next phrase
For the short connecting idea at 5:46, follow the middle D string at fret 2, then the A string at frets 4 and 5. At 8:10, I introduce the longer bass run used near the end of part two.
At 8:35, the demonstrated sequence starts A string: 5, 4, 2, open; low D string: 4, 5. Practise those notes slowly with the bass–treble rhythm, then use the video for the quick ending and its timing. This is a guide to the start of the run, not a complete tab of the phrase.
Add pull-offs without losing the chord
At 6:44, I begin part two with an upstroke and a third-finger pull-off. Try it on the middle D string, then listen to the low-string version. The orange finger in each original chart marks the moving finger. Keep the remaining shape in place as you practise the release.


Part four, from 11:10, contrasts the low and middle pull-offs. The change in register creates variety without needing a completely different accompaniment.
Give part three a lift with the high A shape
At 10:07, I build on the inside A shape by adding two higher notes. Leave out the low strings and listen to the change in register. Let the shape supply the lift without automatically strumming harder.
Try the hammer-on and two-finger Em
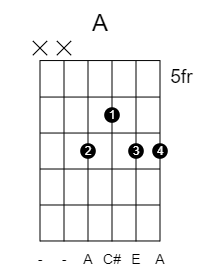
At 12:19, I revisit the bass idea with a small hammer-on change at the second fret. Listen through the following demonstration for the slide and the two-finger Em shape shown at 12:46.


Choose one of these details for a repeat of the tune. If it pulls your attention away from Shane’s melody, simplify it and try again on the next round.
Notation, tabs and alternative chords
For a written setting, try The Mason’s Apron on the IGA Practice Companion, powered by TradChords. You can explore the notation, choose Guitar or DADGAD for melody tab, and look through the chord arrangement as another accompaniment option.
The page opens in A major. Choose G Maj in its Key menu to hear it in the same sounding key as this lesson. It is a separate setting with additional parts, rather than an exact transcription of Shane’s melody or my backing; use the video and charts here for the arrangement I teach.
Listen to another performance with Shane
Here is our earlier standalone recording of The Mason’s Apron, also in G. Listen for the shape of the melody and how the accompaniment sits behind it. Treat it as another performance to listen to and play with, rather than an exact copy of the lesson arrangement.
You can also hear our older set of The Bucks of Oranmore and The Mason’s Apron. The sound is rougher, but it gives you another way to hear the tune in context.
Put it together and play along
The setting in this lesson has four parts. Listen to the complete accompaniment from 13:23, then try Shane’s accordion-only playalong at 15:03.
- First time through, keep the rhythm and chords simple enough to hear the melody clearly.
- On the next round, choose one change: an inside shape, a bass run or a pull-off.
- If the pulse slips, simplify. Let the repeated parts give you time to listen and adjust.
Keep a DADGAD reference beside you
If you would like a general reference while working through the lesson, get my free DADGAD Cheat Sheet. Keep the video open for the tune-specific demonstrations, and give yourself a few runs through with Shane to hear which choices fit.